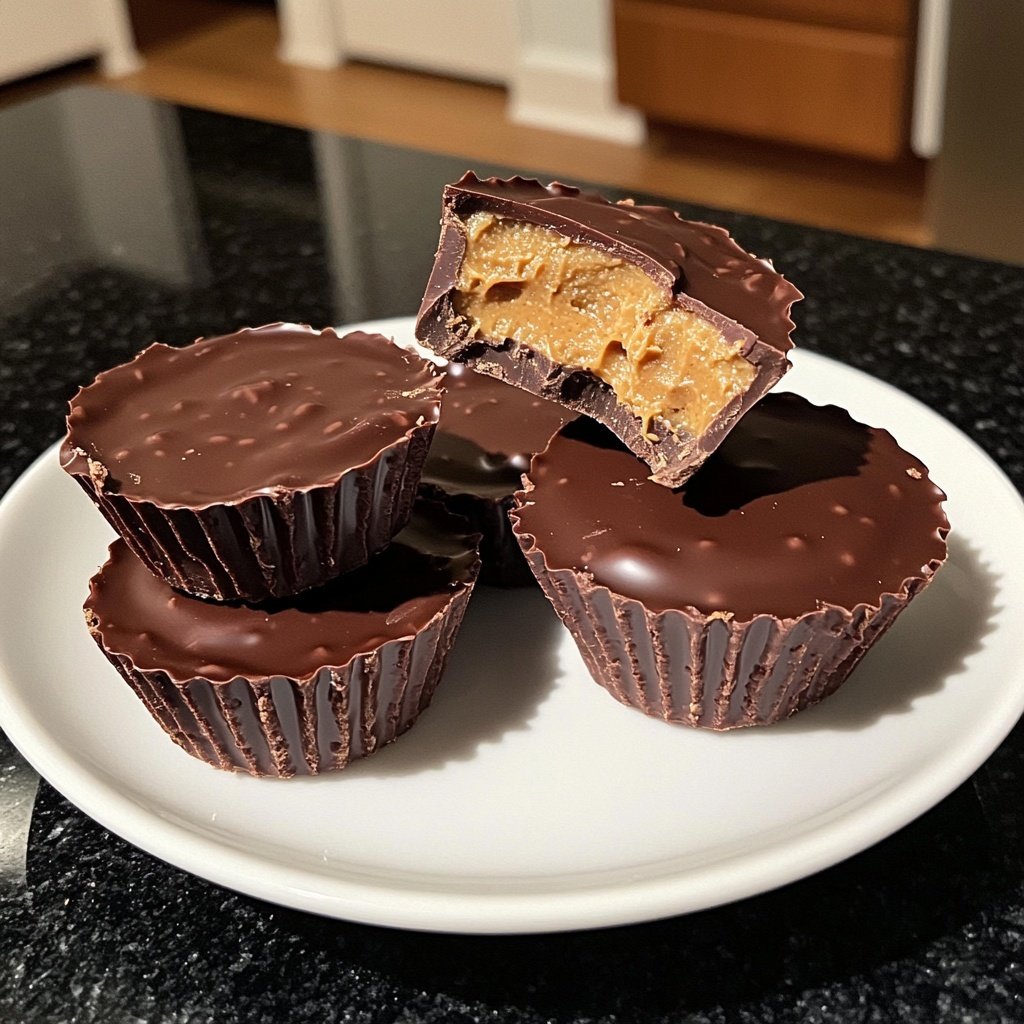
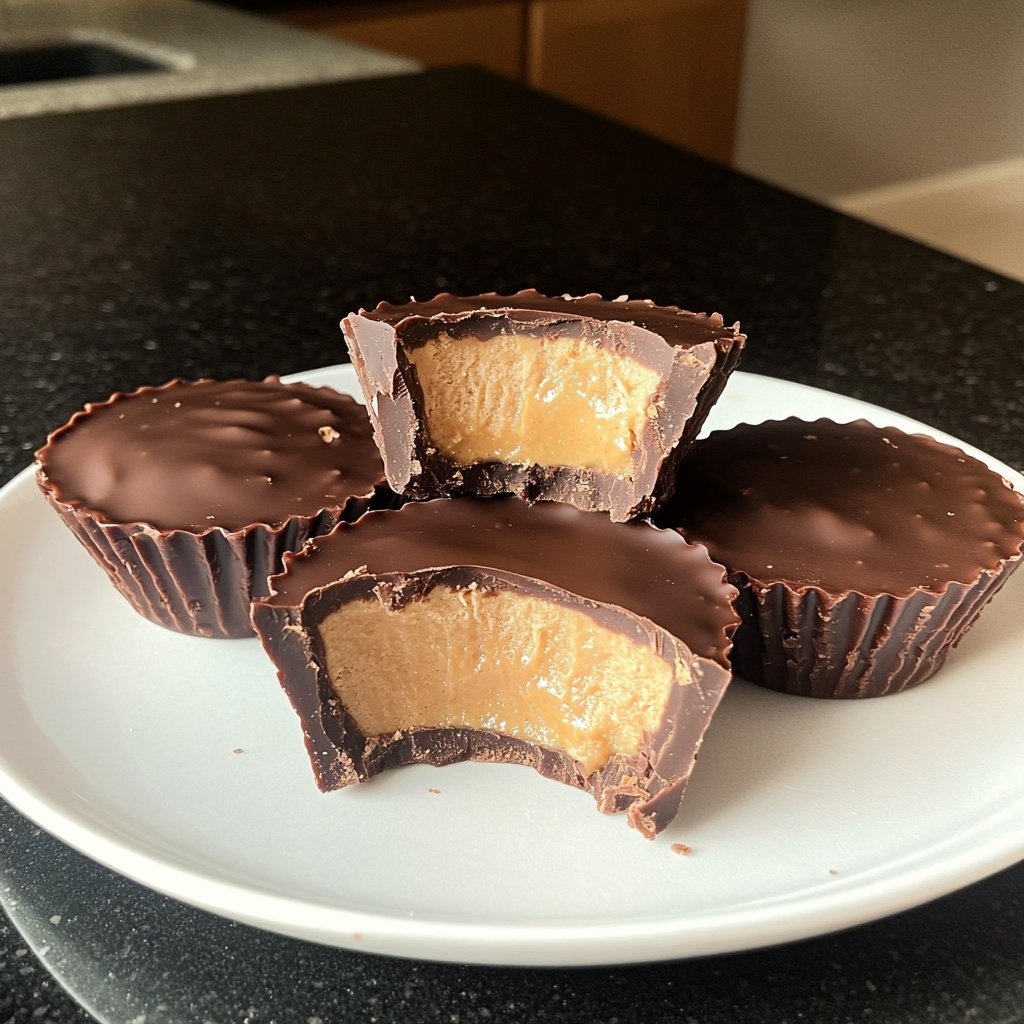
Homemade Peanut Butter Cups with Coconut Oil
Highlighted under: Home Baking Ideas
I have always loved peanut butter cups, but I wanted to make a version that felt a little healthier and more indulgent at the same time. That's when I decided to try using coconut oil in my recipe. The result was delightful! The creamy, nutty flavor combined with the richness of chocolate creates a treat that's truly irresistible. Plus, I appreciate knowing exactly what’s going into my food, making these homemade cups a guilt-free option for any sweet craving.
When I first attempted to recreate the classic peanut butter cup, I knew that coconut oil would add a unique twist. The smoothness of coconut oil serves to enhance the texture of the chocolate, making it easy to work with while also adding a subtle hint of coconut flavor that pairs beautifully with the peanut butter. I found that working in layers allows the flavors to meld perfectly.
As I experimented with ratios, I discovered that a balance of chocolate and creamy peanut butter is key. Incorporating a pinch of sea salt into the peanut butter mixture really elevates the flavor profile, giving each bite a delightful contrast. It's become a staple in my kitchen!
Reasons You'll Love These Treats
- Rich chocolate flavor paired with creamy peanut butter
- Smooth texture thanks to coconut oil
- Quick and easy to make at home
Understanding the Role of Coconut Oil
Coconut oil plays a crucial role in the texture of these peanut butter cups. Its smooth consistency when melted allows for a superior mouthfeel. This oil solidifies when chilled, providing a perfect contrast to the rich peanut butter filling. If you're looking for a dairy-free or vegan alternative, coconut oil is an excellent option that enhances the overall flavor profile without overshadowing the nutty essence of peanut butter.
When melting coconut oil, use a microwave or a double boiler. Be cautious to melt it slowly; overheating can cause it to burn and develop an unpleasant taste. A good practice is to melt it just until liquid and then mix it immediately with other ingredients to prevent any adverse effects on flavor and texture.
Texture and Temperature Matters
The ideal texture of your peanut butter filling is achieved by ensuring all ingredients are blended thoroughly. Aim for a velvety smooth consistency without lumps. If your peanut butter is too thick, consider gently warming it in the microwave for a few seconds to make it easier to mix with the melted coconut oil and sugar. This will yield a creamier filling that spreads easily on top of the chocolate layer.
During the melting process, keep an eye on the dark chocolate chips. Heat them until they're glossy and fully melted, but avoid high heat as it can seize the chocolate. If your chocolate does seize, adding a few drops of coconut oil while stirring may salvage it, returning it to the smooth texture required for coating.
Make-Ahead and Customization Options
These peanut butter cups can be prepped ahead and stored in the freezer for those sweet cravings. Once set, transfer them to an airtight container and keep them in the freezer for up to 2 months. When you’re ready to enjoy, let them sit at room temperature for 5-10 minutes to soften slightly before indulging for the best texture experience.
Feel free to get creative with these cups! You can add a pinch of cinnamon or a dash of sea salt on top of the chocolate layer for an enhanced flavor profile. You can also mix in crushed nuts or even a sprinkle of your favorite seeds in the peanut butter filling for added crunch and nutrition.
Ingredients
Ingredients
For the Peanut Butter Filling
- 1 cup creamy peanut butter
- 1/4 cup coconut oil, melted
- 1/4 cup powdered sugar
- 1/2 tsp vanilla extract
- 1/4 tsp sea salt
For the Chocolate Coating
- 1 cup dark chocolate chips
- 1 tbsp coconut oil
Mix all filling ingredients until smooth before layering with the chocolate.
Instructions
Instructions
Prepare the Molds
Line a muffin tin with cupcake liners to hold the cups.
Mix the Peanut Butter Filling
In a bowl, mix together the peanut butter, melted coconut oil, powdered sugar, vanilla extract, and sea salt until smooth. Set aside.
Melt the Chocolate
In a microwave-safe bowl, combine dark chocolate chips and coconut oil. Heat in 30-second intervals, stirring in-between until completely melted.
Layer the Ingredients
Pour a small amount of melted chocolate into the bottom of each cupcake liner, just enough to cover the base. Place in the freezer for about 10 minutes to set.
Add the Peanut Butter Layer
Remove from the freezer and add a spoonful of the peanut butter mixture on top of the chocolate layer, smoothing it out. Pour more melted chocolate on top to cover the peanut butter filling.
Final Freeze
Return the cups to the freezer for another 15-20 minutes until fully set. Remove from liners and enjoy!
Store any leftovers in the refrigerator for up to a week.
Pro Tips
- For an extra touch, sprinkle some sea salt on top of the chocolate layer before freezing for added flavor.
Serving Suggestions
These homemade peanut butter cups are versatile treats perfect for various occasions. They can be served as part of a dessert platter, paired with fresh fruit for an elegant snack, or even offered with coffee for a delightful afternoon treat. They’re also great for packing in school lunches or bringing along to potlucks.
For a more decadent dessert, you might consider drizzling melted chocolate or a homemade caramel sauce over the top just before serving. This can elevate the dish and impress guests with minimal extra effort.
Troubleshooting Tips
If you notice that your chocolate coating isn’t sticking well to the peanut butter filling, it’s possible that the peanut butter layer is not chilled enough or that the chocolate is too hot. Ensure that the chocolate has cooled slightly but is still pourable, and allow the peanut butter layer to set in the freezer for the right firmness.
In the event of a breakout or cracking in your cups after freezing, this might indicate that the cups were either overfilled or the chocolate layer was too thick. A good approach is to apply a thinner layer of chocolate to encapsulate the filling, aiming for an even distribution to reduce pressure during freezing.
Questions About Recipes
→ Can I use natural peanut butter?
Yes, natural peanut butter works great, just make sure it’s creamy and well-mixed.
→ How long can I store these peanut butter cups?
They can be stored in the refrigerator for up to a week or in the freezer for up to a month.
→ Can I substitute coconut oil with something else?
You could use vegetable oil, but it may not provide the same flavor or texture.
→ Are these gluten-free?
Yes, as long as you use gluten-free chocolate chips and powdered sugar, they are gluten-free.
Homemade Peanut Butter Cups with Coconut Oil
Created by: Sophie Adams
Recipe Type: Home Baking Ideas
Skill Level: Beginner
Final Quantity: 12 cups
What You'll Need
For the Peanut Butter Filling
- 1 cup creamy peanut butter
- 1/4 cup coconut oil, melted
- 1/4 cup powdered sugar
- 1/2 tsp vanilla extract
- 1/4 tsp sea salt
For the Chocolate Coating
- 1 cup dark chocolate chips
- 1 tbsp coconut oil
How-To Steps
Line a muffin tin with cupcake liners to hold the cups.
In a bowl, mix together the peanut butter, melted coconut oil, powdered sugar, vanilla extract, and sea salt until smooth. Set aside.
In a microwave-safe bowl, combine dark chocolate chips and coconut oil. Heat in 30-second intervals, stirring in-between until completely melted.
Pour a small amount of melted chocolate into the bottom of each cupcake liner, just enough to cover the base. Place in the freezer for about 10 minutes to set.
Remove from the freezer and add a spoonful of the peanut butter mixture on top of the chocolate layer, smoothing it out. Pour more melted chocolate on top to cover the peanut butter filling.
Return the cups to the freezer for another 15-20 minutes until fully set. Remove from liners and enjoy!
Extra Tips
- For an extra touch, sprinkle some sea salt on top of the chocolate layer before freezing for added flavor.
Nutritional Breakdown (Per Serving)
- Calories: 200 kcal
- Total Fat: 15g
- Saturated Fat: 8g
- Cholesterol: 0mg
- Sodium: 40mg
- Total Carbohydrates: 16g
- Dietary Fiber: 2g
- Sugars: 8g
- Protein: 5g