Homemade Reese’s Cups with Crispy Rice
Highlighted under: Home Baking Ideas
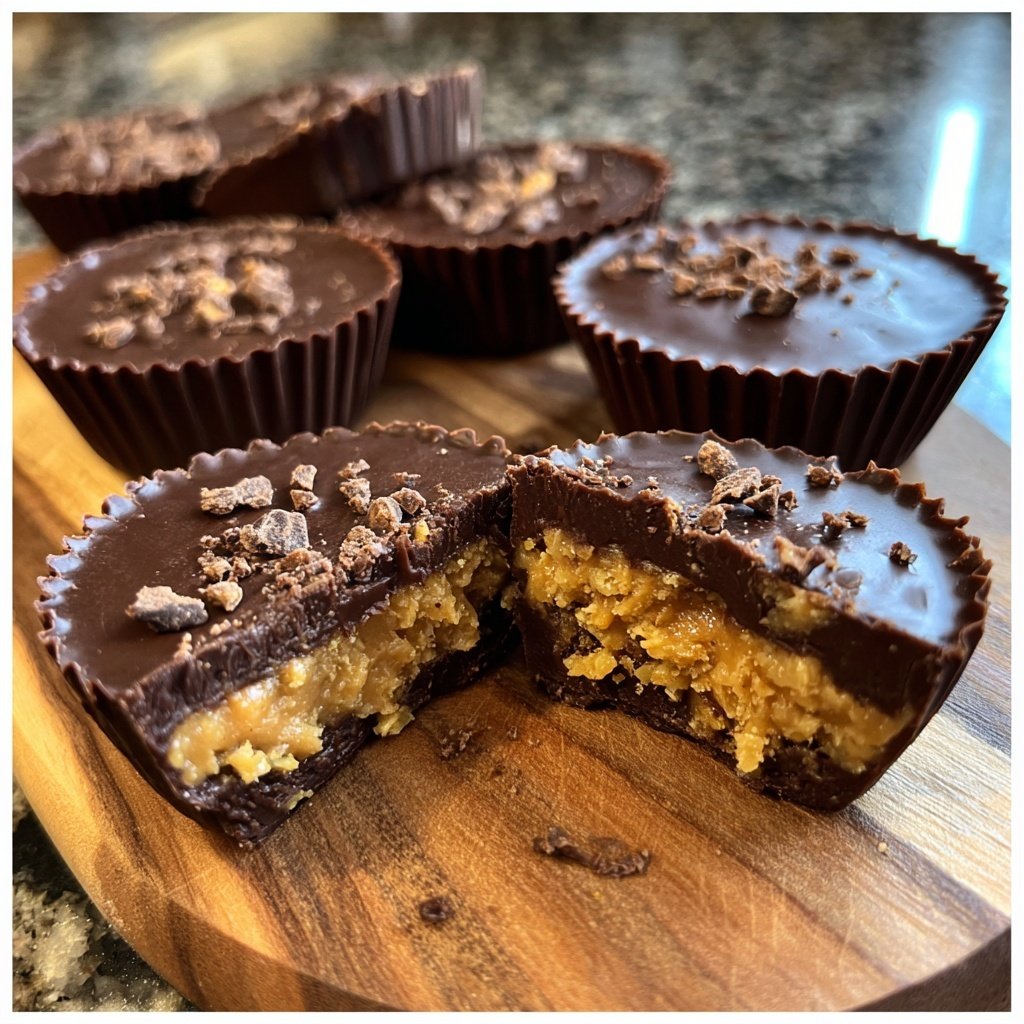
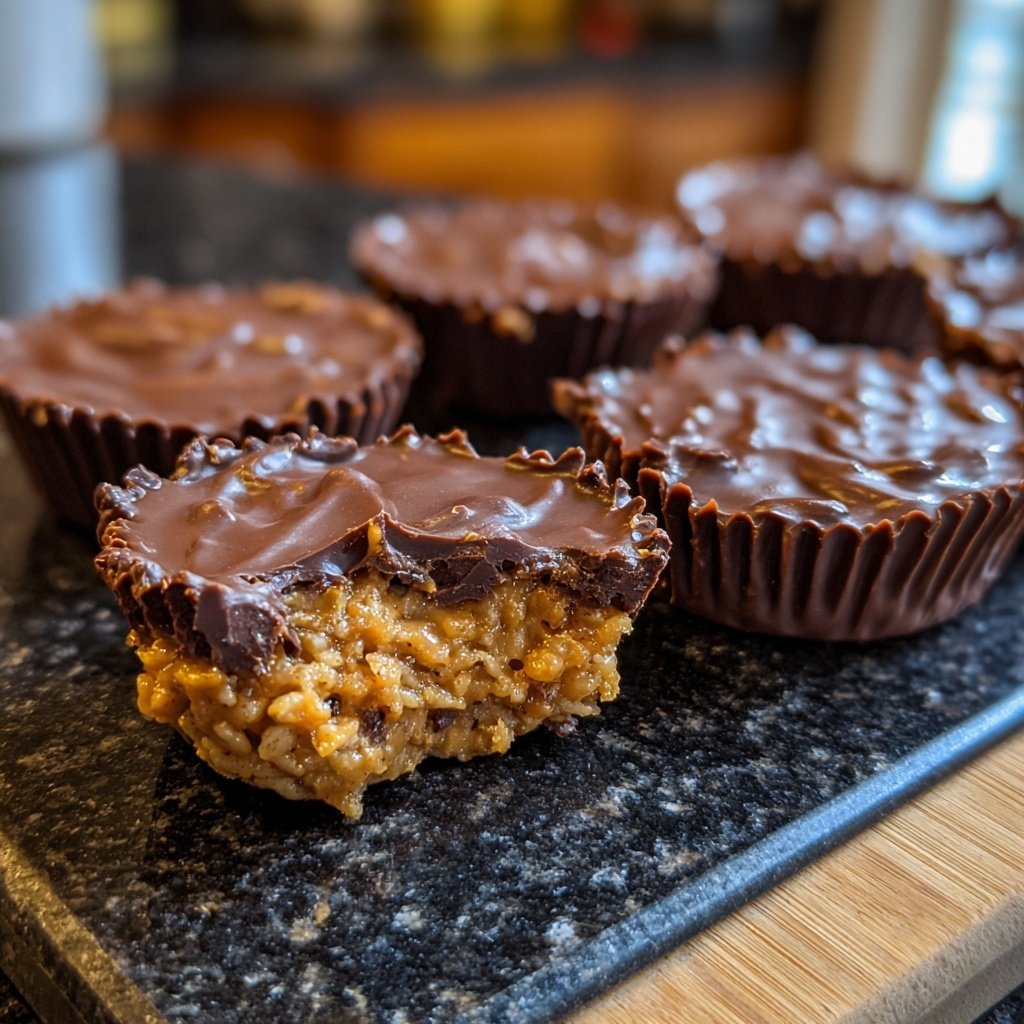
I love making these Homemade Reese's Cups with Crispy Rice because they offer a delightful twist on the classic treat. The combination of creamy chocolate and peanut butter perfectly complements the added crunch of crispy rice. Not only do they satisfy a sweet tooth, but they are also surprisingly easy to whip up at home. It’s a fun project that brings a bit of nostalgia and is ideal for sharing with friends or family. I can promise you that once you try these, store-bought versions will never stand a chance!
When I first decided to try making Reese's Cups at home, I was surprised at how simple it turned out to be. The addition of crispy rice not only adds texture but also lightens up the rich peanut butter filling. After experimenting with different ratios, I've found that the perfect blend is equal parts chocolate and peanut butter, with just enough crispy rice to give it that satisfying crunch. The satisfaction of biting into a homemade treat is truly unparalleled!
One tip I discovered is to ensure your chocolate is tempered properly; this makes it easier to coat the cups evenly and prevents them from becoming too thick. I also like to let them cool completely before biting in so the filling sets just right. Trust me, making them at home allows for customization, like adding a sprinkle of sea salt on top for that gourmet touch!
Why You'll Love This Recipe
- Rich chocolate flavor paired with creamy peanut butter and crispy rice texture
- Easy-to-follow recipe that brings out your inner chocolatier
- Ideal for sharing or enjoying as a personal treat
Perfecting the Chocolate Layer
When melting chocolate, it's crucial to use a microwave-safe bowl and heat it in 30-second intervals. Stir vigorously between each interval to prevent the chocolate from seizing. You want a smooth, glossy texture without any lumps. If your chocolate isn't melting uniformly, check your microwave's power settings. Sometimes lowering the wattage can help achieve a more consistent melt without burning.
Another key tip is to let the chocolate cool slightly before pouring it into the molds. Hot chocolate can potentially melt the peanut butter layer if it comes in direct contact. Aim for a temperature that is warm but not hot to the touch, allowing it to maintain its fluidity without jeopardizing the textures of the cups.
Building the Peanut Butter Filling
The peanut butter in this recipe acts as both a flavor and texture enhancer. For a creamier filling, opt for a higher fat peanut butter rather than natural styles, as the latter can be too oily. If you're looking for a healthier option, almond or cashew butter can work just as well, providing a different but delightful flavor that complements the chocolate and crispy rice.
When mixing the filling, be sure to thoroughly combine the powdered sugar with the peanut butter before adding the crispy rice. This ensures an even distribution of sweetness throughout. If your mixture feels too dry, a teaspoon of warm water can help achieve the desired consistency without compromising the flavor.
Tips for Serving and Storing
Once your homemade Reese's Cups are set and removed from the liners, consider drizzling some extra melted chocolate on top for added decoration and indulgence. You could also sprinkle some sea salt or crushed nuts to enhance the flavors, creating a more gourmet experience. They make excellent gifts when wrapped in decorative boxes or bags.
These treats can be stored in an airtight container in the fridge for up to two weeks. If you wish to keep them longer, try freezing them. Place them in a single layer in a freezer-safe container with parchment paper between layers to prevent sticking. To enjoy, simply let them thaw at room temperature for a few minutes before indulging.
Ingredients
Gather these ingredients before you start:
Cups
- 1 cup milk chocolate chips
- 1/2 cup creamy peanut butter
- 1/2 cup crispy rice cereal
- 1 tablespoon powdered sugar
- 1/4 teaspoon vanilla extract
Make sure all your ingredients are at room temperature for the best results!
Instructions
Follow these simple steps to create your homemade Reese’s Cups:
Melt the Chocolate
In a microwave-safe bowl, melt the milk chocolate chips in 30-second intervals, stirring in between until smooth.
Prepare the Molds
Using a cupcake or muffin tray, line with paper liners. Pour a small amount of melted chocolate into each liner, just enough to coat the bottom.
Mix the Filling
In a separate bowl, combine the peanut butter, powdered sugar, vanilla extract, and crispy rice. Mix until well incorporated.
Assemble the Cups
Spoon the peanut butter mixture into each chocolate-lined cup. Then, cover the filling with the remaining melted chocolate, ensuring it is well sealed.
Chill
Place the tray in the refrigerator for about 10 minutes or until set. Once hardened, carefully remove from the liners.
Serve and Enjoy
These delicious treats can be enjoyed immediately or stored in an airtight container in the fridge for later!
Enjoy your homemade treats and remember to share them with friends!
Pro Tips
- For a different flavor profile, try using dark chocolate or adding a pinch of sea salt on top of each cup before chilling.
Ingredient Substitutions
In place of milk chocolate chips, dark or semi-sweet chocolate chips can create a richer flavor profile. If you are looking for a dairy-free option, both dairy-free chocolate chips and nut butter substitutes can be used to maintain the treat's decadence without the dairy. Be sure to check the labels for any cross-contamination with allergens.
If you prefer a little added crunch, consider adding crushed pretzels or nuts to the filling. This not only enhances the texture but also introduces a contrasting salty element that pairs beautifully with the sweetness of the chocolate and peanut butter. Just keep a close eye on ratios to ensure the cups maintain their structure.
Scaling Up the Recipe
This recipe is easily adjustable if you're planning a larger gathering or event. You can double or even triple the quantities of all ingredients while keeping the steps the same. Just be mindful when melting chocolate in larger batches; you may need a bigger bowl and should monitor the melting process closely to avoid burning.
Using a larger tray with more liners can help you make more cups at once, reducing the time spent. If you find yourself making a lot of cups, consider using silicone molds, which can make pop-outs significantly easier than paper liners and can be reused multiple times.
Questions About Recipes
→ Can I use different types of chocolate?
Absolutely! You can use dark chocolate, white chocolate, or even a mix of your favorites.
→ How should I store these homemade cups?
Store them in an airtight container in the refrigerator for up to a week.
→ Can I use crunchy peanut butter instead?
Yes, crunchy peanut butter will add an extra layer of texture and flavor.
→ Is there a dairy-free option?
Yes, you can use dairy-free chocolate and nut butter alternatives to make these treats vegan.
Homemade Reese’s Cups with Crispy Rice
Created by: Sophie Adams
Recipe Type: Home Baking Ideas
Skill Level: Beginner
Final Quantity: 12 cups
What You'll Need
Cups
- 1 cup milk chocolate chips
- 1/2 cup creamy peanut butter
- 1/2 cup crispy rice cereal
- 1 tablespoon powdered sugar
- 1/4 teaspoon vanilla extract
How-To Steps
In a microwave-safe bowl, melt the milk chocolate chips in 30-second intervals, stirring in between until smooth.
Using a cupcake or muffin tray, line with paper liners. Pour a small amount of melted chocolate into each liner, just enough to coat the bottom.
In a separate bowl, combine the peanut butter, powdered sugar, vanilla extract, and crispy rice. Mix until well incorporated.
Spoon the peanut butter mixture into each chocolate-lined cup. Then, cover the filling with the remaining melted chocolate, ensuring it is well sealed.
Place the tray in the refrigerator for about 10 minutes or until set. Once hardened, carefully remove from the liners.
These delicious treats can be enjoyed immediately or stored in an airtight container in the fridge for later!
Extra Tips
- For a different flavor profile, try using dark chocolate or adding a pinch of sea salt on top of each cup before chilling.
Nutritional Breakdown (Per Serving)
- Calories: 180 kcal
- Total Fat: 10g
- Saturated Fat: 3g
- Cholesterol: 0mg
- Sodium: 50mg
- Total Carbohydrates: 20g
- Dietary Fiber: 1g
- Sugars: 12g
- Protein: 3g